September 8, 2009

DIY Hair Bow Holder

P9080019

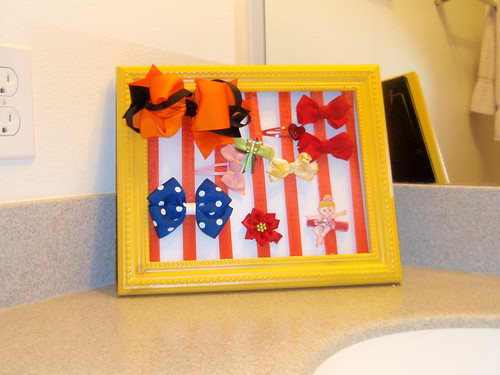
I've seen these larger in size at a hair salon for children, where they use them to display the bows they have for sale. I decided it was an easy enough project to make on my own, it some what organized the many random bows that we have laying around thanks to having lots of girls in the house, and it was different than just sticking it on a ribbon hanging from the wall or doorknob.

Step One

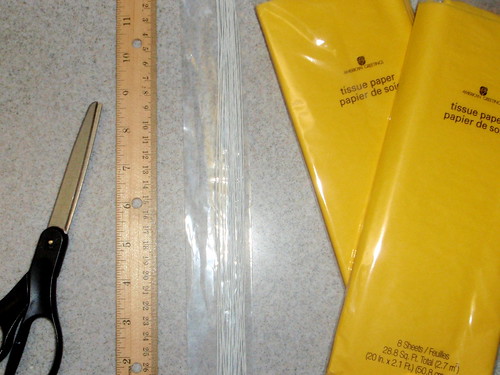
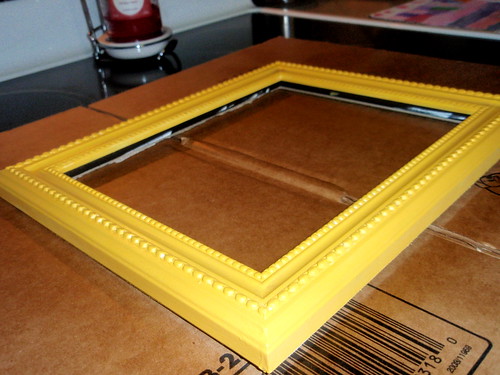
Start out with any old frame you have laying around or you can buy a really ugly cheap one like I did. The finish on this thing was just awful, but I liked the texture it had. I wouldn't use anything smaller than an 8 X 10, and definitely use something bigger if you have a lot of bows to display. I'd go search the clearance section at discount stores like Ross for dinged up pictures (because you won't need the picture) or a thrift store. Remove everything from the frame including the glass.

P9070006

Step Two

This is what will take you the longest. Layer after layer of paint to get your desired color. Since my frame was so dark to begin with I chose to prime it first and then layer my color on top of the primer. Make sure you get even the tiniest of edges on the inside of the frame that sits above the glass notch.

P9070012

Step Three

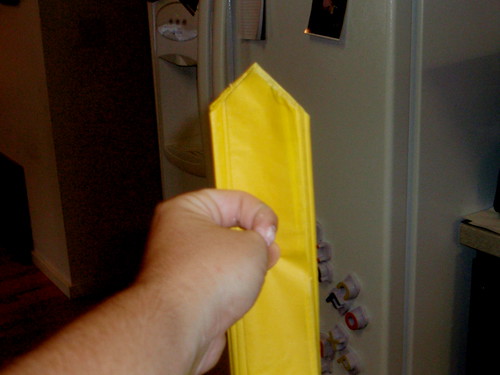
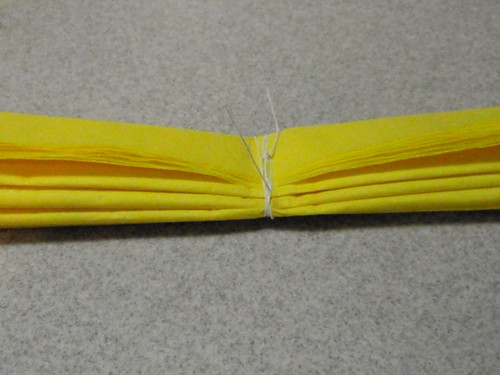
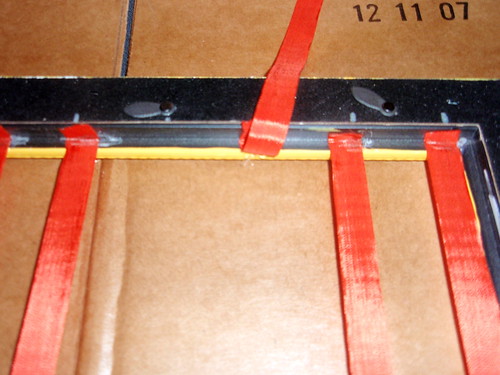
Once your paint is dry you can start hot gluing the ribbon on the backside of the glass notch. Space the ribbon out to your desired width and use as many as you would like. I used a popsicle stick to make sure that the ribbon had secured itself nicely in the glue and also avoided burning my fingers in the process.

P9070013

Step Four

You can choose to be done like I did at this point. Just replace the glass, put a plane sheet of paper or a fancier scrapbook paper to match your decor, and secure the back of the frame. You can either set it on display or hang it from a wall. Of course you can get even more industrious and instead of replacing the glass...use a piece of cardboard cut the same size as the glass and cover it in pretty fabric. I'm actually probably going to go that route, but I wanted to get the tutorial up today and need to go scout the scrap section of the fabric store still.

P9080017

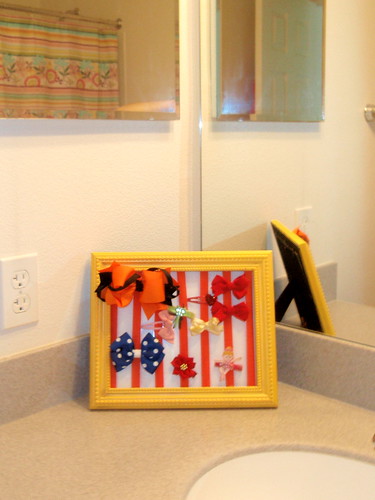
I hope this at least sparks some creative ideas for you! It's a good reminder sometimes that we don't have to just throw things haphazardly into a basket, only to have to dig and dig to find exactly what we are looking for.

~Audrey

September 7, 2009

Stuff to get me by

I started a project a couple of days ago that is still sitting on the burner, and then I began another project this afternoon that I didn't expect to take as long as it is. I love sitting and watching paint dry *rolls eyes*. So, I guess until I can give you something else to look at with or without tutorial here are a few things I dug out of my photobucket this morning.

The first is our old house when we first moved to Hawaii. We were allowed to paint the walls, so I probably went a little overboard. Imagine that.

Photobucket
Photobucket
Photobucket

I never finished it. Kind of sad about it now that I look back. I wondered when I started with the original plan if the big tree would scare the crap out of Gillian at night. Amazingly it did not. She still tells me that she misses that house and her wall. I think really the only thing she misses is the wall.

Here's Brenna's. Not as overwhelming as Gillian's.

Photobucket

I got into painting names for nursery's for a while. It ended up that I couldn't charge enough to make a profit off of it. Too much work to do for free.

Photobucket

And I hope my parents don't mind me posting pictures of their living room, but these are my favorite. Richard always promised me when we bought a house that he would make sure I'd have a mud room with a wheel and a kiln. I miss throwing....

Photobucket
Photobucket

And that's all she wrote about that. I'm hoping that I have a finished project to share with you tomorrow.

Until then.

~Audrey

September 6, 2009

DIY Tissue Paper Flowers


I've had friend after friend after friend ask me about the tissue paper flowers I made and hung up in my oldest daughter's room. I said that one day I would make a tutorial showing them how easy (and cheap) they are to make, and that day has FINALLY come!

To begin with these are the supplies you are going to need.

P9060022

12 sheets any color tissue paper that you want to work with
floral wire
a good sharp pair of scissors
ruler (optional)

Step One

Lay out 12 pieces of your tissue paper flat on top of each other lined up as good as you can. (From what I have noticed a package typically contains 8 pieces, so 3 packages will make 2 flowers for you.) Once you have these lined up you need to measure with your ruler and make a crease on one end about 1 and 1/2 inches in. A rough way to guesstimate this is half the width of the pre-folded crease from the packaged tissue paper. Continue folding the tissue paper accordion style to the opposite end.

P9060027
P9060030

Step Two

This is where the "sharp" pair of scissors comes in hand. You may just want to take a few folds at a time if you don't have a sharp pair of scissors and cut each end into a point like such.

P9060032

It doesn't have to be perfect. Believe me, I am a self proclaimed perfectionist when it comes to this kind of thing typically. But, with this project the petals will end up blending in together well. This was most time consuming part for myself, because I have crappy scissors! If you want to add a different texture in your mass of flowers, you can round off the ends instead of making them into points.

Step Three


Find the mid-point of the length of your tissue paper. Take your floral wire and wrap it around it making it nice and secure. Leave the ends a bit longer and if you plan on hanging like the original picture, make a loop with the remaining length.

P9060034

Step Four

Spread out the layers of your fan without flattening the creases.

P9060035

Begin peeling back the layers one by one on both sides of the fan. When you get a few layers through, it'll start to look like this.

P9060037

One you are all through, fix any holes and flat spots. It should end up looking like this.

P9060038

When you hang them from the ceiling, you will need a few small eyelet hooks and some fishing line (or clear jewelry string). This is why I said to leave a bit of length on the floral wire and create a loop. Cut the fishing ling to the desired length. Tie a loop on one end to go through the hook. Tie a knot in the other end once it's looped through the floral wire.

This is a really cheap project and adds three deminsional value to any space. Each package of tissue paper cost me seventy five cents and the whole package of floral wire cost one dollar.

Happy Creating!

~Audrey~

July 19, 2009

Happy 14 Weeks To Me!

I'm finally officially in the second trimester. This pregnancy is dragging major butt. I don't have decent pregnancies to compare it to though. The first child that entered my world didn't inform me she was in there for almost the whole first trimester. The second child that took up residence in my uterus did so when I had a 9 month old to take care of. This go around I have completely self sufficient children to contend with and an absent husband. I'm not even wiping butts anymore...guess I counted my lucky stars too soon on that one.

The second trimester comes very bittersweet to me. For one thing I get to find out the gender of the baby in just a couple of weeks. Some are betting boy, some are girl. I have my own educated guess, but if you really are that interested in what I think it is you could just ask...or you could wait two weeks to find out the truth. We are ready to welcome a healthy baby, no matter the sex. Although I'm finding it hard to wrap my head around anything boy related...even names.

The bitterness. Evil pubic symphisis dysfunction. If you get grossed out easily by pregnant women and their bodily functions, please read no further. Pubic symphisis dysfunction or otherwise known as pelvic separation happens when your body prematurely excretes the hormone that allow your pelvis to separate and the baby's head to fit through the birth canal. Thus, your pelvic area starts to loosen and separates while you are still pregnant. I never had this wonderful side effect with G, but was blessed when I was pregnant with B. It's rearing it's ugly head again. Feeling the bones between your legs grinding into each other as you are shopping in the mall is not a pleasant experience. Neither is feeling your crotch pop as you are rolling out of bed in the middle of the night when your bladder is being smashed like a pancake. Throw in the severe back aches, the sharp pains running down your legs...getting the point? I hope so cause just writing about it is making me ache. So, it has kicked in already. No fair. No freaking fair.

Pity party for one please. Is it not hard enough that I have to parent both of the girls alone while Richard is away at school, grow this baby as good as possible, prepare for said baby, pack out our house, clean and clear our house, ship our car on a boat cross country, fly 4000 miles with the kids alone to meet my husband at 8 months pregnant..... But no. I have to do all of this that I had every intention of doing with a smile plastered on my face. I have to do all this, smiling, all the while my crotch bones are grinding and popping.

So is life. So is life.

July 8, 2009

12 Weeks

Photobucket

I don't think it looks like I've gotten much bigger after seeing this picture but I feel bigger! I'm definitely out of all of my regular jeans and am in dire need of buying more than the one pair of maternity jeans that I'm sporting right now. I've got a couple of selections sitting in "checkout" waiting for payday because I'm breaking down....the cheapest pair that I've picked out are $75. I cringe at that thought, but then I think...I'd spend that much on a normal pair of jeans to have a GOOD pair of jeans so why should now be any different? Especially when you buy so little for yourself because you will live in these clothes for such a short period of time, but the things you buy you wear the heck out of???

I get to go hopefully (fingers crossed) hear the heartbeat at my first official appointment with the doctor on Friday. I at that point will make a good guesstamation at the gender of the baby. Both of the girls had heartbeats around 140 or slightly higher. I know they say that the gender doesn't determine the heart rate while they are in the womb, that it takes a few weeks after they are delivered for it to change per sex, but if both my girls were the same then you would think there is a little truth to it right? Who knows. I guess all babies are different! I can still drive myself crazy though until August when I can officially find out :)